Pages

Sunday, October 14, 2012

New Workout: Pilates


I have to say, when I heard about Pilates, I was skeptical on how the workout can help you loose weight and stay fit. But after doing some research to learn about the history of Pilates and the purpose of techniques, I wanted to give this workout a try. At SJSU, I enrolled in a Pilates course to fill up my break time in between classes.

*Another helpful tip: If you go to college and find yourself waiting about an hour before your next class, try filling up the time by enrolling in a physical education activity. Your school has the resources for you to stay fit...for FREE! At my university, sometimes all you need is a student ID card and you are able to go workout at the school gym. Take these resources to your advantage! If I knew about this sooner, I would've exercised a bit more and prevented all this weight gain. 

The Pilates workout system was invented by Joseph Pilates that became a very popular rehabilitation exercise for patients. He mostly focused on working the body's ability to become more flexible and resulting in leaner muscle and tone. Most Pilates workout sessions today focus on strengthening the core muscles as wells as toning the major leg muscles. The exercises help you build flexibility, lengthen and lean muscles, and build strength and stamina. With controlling your mind and body, you can improve your flexibility, enhance your core strength, and acquire agility.


* I would also like to say that this exercise does help you gain muscle and muscle burns fat! I have been doing Pilates since the end of August and I have noticed that my abdominal muscles as well as my thighs and glutes have toned! I can feel my abdominals when I flex them and are they amazing, lol! With the gain of these muscles, I have noticed my waist getting smaller, mostly because the muscles burn the fat.

So, if you have the time to add another exercise regime to your workout, I highly recommend you trying Pilates! It takes some time to get used to, but if you practice regularly, you can get the hang of Pilates in no time!


Stay Healthy, Stay Strong, Stay Beautiful!!!
-arlynangel

Thursday, October 11, 2012

A Fun Way To Organizing Your Studs On A Jewelry Tree

Has this ever happened to you?
Are you tired of getting your studs mixed up in your jewelry box?
Do you find yourself missing the other pair to your favorite earring?


Don't fret!!! There is a simple trick you can use to keep your earrings and studs together and well organized. You can do many variations with this trick. Personally, I keep all my jewelry on a jewelry tree. I normally kept  the studs on the base of the tree, but I found it very difficult when looking for a pair of earring to wear. So, I wanted to store my studs on the tree itself not only for easier storage, it was easily accessible. However, like most jewelry trees, my tree did not give me that option. Here, I'll give you a simple trick for easier storage and organization.


What you will need:
  • A ribbon - Any type you'd like! I found that many types of ribbions are great for this project. Just make sure you have enough to store as many earring's you have. This project is all about you, so let it reflect who you are :)
  • A pair of studs you won't be needing - If you have a pair of simple studs you don't wear anymore or just have a few cheap studs lying around, save a pair that you will use as a clasp so that you can securely hang your ribbon on the tree.


Here is what you do:
  • Get your ribbon and fold it a third of the way. The short end of the ribbon will be the back while the longer end will hold the earrings.
  • Organize your earrings and clasp them onto the longer ribbon side.
  • When your done, simply slide the loop on a branch of your jewelry tree.

There you have it! I like to think if this as ornaments on your jewelry tree while the earrings symbolizes your style. 

Another tip: If you don't have a jewelry tree, you can also use this method for your jewelry box. You can just skip the step where you make the loop. All you have to do is clasp your earrings onto a piece of ribbon and store them in your jewelry box. 

Hope you enjoyed this simple project and that it helped you as much as it helped me!

Stay Beautiful!
-arlynangel


                                                                                                       Jewelry Tree from Target 

What is it with BB Creams?

Lately there has been a BB cream craze since Smashbox Cosmetics came out with their line of BB creams. However, little do we know that BB creams originated in Germany after a dermatologist created a cream that would protect patients' skin after surgery. The BB creams were introduced in Korea and Japan as a form of cosmetic. The most distinct feature about BB creams is it's ability to provide a healthy, blemish free, and porcelain-looking skin which amazed many Asian women. 


So what do these BB creams do? First of all, BB stands for Blemish Balm and an all in one tinted moisturizer. In Asian countries, BB creams are formulated to moisturize, even and whiten complexion, as well as treating and covering blemishes. There are also anti-wrinkling and skin regenerating properties. However, the BB creams formulated in the western countries are more focused on moisturizing, covering blemishes, evening skin tone, SPF protection and coverage. Basically, BB creams strive to become the alternative to a heavy foundation routine. It is meant to be worn by itself, but through experience, it is recommended to set with a translucent powder or a light mineral powder foundation for a longer lasting wear and coverage.


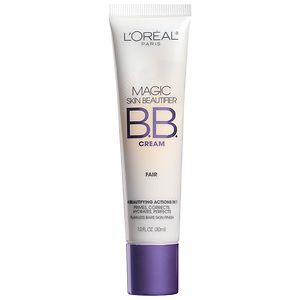
I have tried three different BB creams: Garnier's Skin Renew Miracle Skin Perfector, Maybelline New York's Dream Fresh BB Cream, and L'Oreal Magic Skin Beautifier BB Cream. I have come to the conclusion that L'Oreal's version had the best overall performance.


Garnier's BB cream gave good coverage, but it wasn't long lasting. I have oily skin, so I usually look out for products that leave me feeling really oily at the end of the day. Sadly, Garnier did not help with controlling oil. I would recommend this product for those who have dry skin. It did really well in keeping my skin very moisturized and hydrated.


Maybelline's BB cream was my least favorite of the three BB creams. First, I have acne scars that I usually cover up with a concealer. Since Garnier gave me good coverage, I was expecting the same coverage with Maybelline. However, I found that Maybelline was very sheer coverage. I also found that it left your face looking very dewey and sticky which is good for moisturizing, but I find it better to set with a powder. Also, another reason why this is not my favorite is because it left me really, really oily. After only a couple of hours, I can start to feel my face oiling up and needed a blot touch up by the end of the day.


My favorite would have to be L'Oreal's Magic Beautifier. This BB cream is very unique from the other two because instead of coming out already pigmented, the cream comes out white with small pigment beads that burst when you rub it on your face. The cool thing about this cream is that after the cream is applied, it will need a few seconds to set itself to accomodate your skin color. After setting, the cream has less coverage than Garnier's but more coverage than Maybelline. So, if you have perfectly even skin or just need the right amount of coverage for a natural look, this product is for you. Also, this product did very well with keeping my skin oil free at the end of the day. A tip for using L'Oreal's BB cream is to set with a powder foundation to get the coverage you want. It also helps in enhancing the BB cream's ability to keeping your skin oil free.


My opinion on BB creams: these are nice for moisturizing and replacing your tinted moisturizer. However, if you need full on coverage, I would advise to stay with your concealer routine or use concealer with this product. These products are good for those days where you are in a hurry and need a bit of coverage. I would recommend to use translucent setting powders of powder foundations on top of these products. 

Sunday, September 23, 2012

Knowing Your Skin

Alright, before we do anything to our skin whether it be finding cleansers or choosing cosmetics, the first step we have to do is to know our skin! 

There are many types of moisturizers, cleansers, and make up for us to choose. The best results come from the products that are best formulated for your skin type. Our job is to learn what is best and what is not best for our skin to prevent harsh damage and unwanted reactions. 

So, as you're standing at the health and beauty aisle, you're probably asking yourself, "Uhm, so how do I know what skin type I have?" 

Here's a quick and easy way to test your skin type. All you need is one sheet of blotting paper (any brand is fine). 

*NOTE: make sure you do this before cleansing your face.

Step 1: Take the blotting paper and blot the oiliest parts of one side of your face. 

Step 2: Blot the paper on your forehead, nose and chin.

Step 3: Compare both sides of your face as well as the blotting paper with the following skin results. The closest match to what you've uncovered will be your skin type.

Oily Skin: You will see a noticeable difference in sheen when comparing both sides of your face. The blotting paper should also be full of oil indicating all the oil it has collected from your face. 
 -> If you have oily skin, you should look for products that are directed towards oily skin such as light formula and oil free. For cosmetics, you should look for products that are lighter on the skin and water based. Also, powder is much needed to remove excess shine from your T-zone.
 -> You should be aware that oily skin ages best. Your face has enough oil to keep it hydrated and most of the oil produced on your skin has nutrients to keep it soft and supple. Thus, giving you a younger looking face as you age. 

Normal Skin: You will see a slight difference in sheen when comparing both sides of your face. The blotting paper will show little oil. 
 -> If you have normal skin, you are basically free to use any type of product that's on the market ranging from oil based to water based products. 
 -> For normal skin types, you will notice a change in oiliness and dryness as you age resulting in a change of skin care routine depending on the problem you have. 

Dry Skin: You will see barely any change in both sides of your face as well as very little to no oil on the blotting paper. 
 -> If you have dry skin, you must moisturize to keep your face hydrated to prevent irritation and discomfort. You should look for products that are oil-rich or oil-based. Because alcohol is known for it's quick drying properties, you should avoid using products with alcohol.
 -> For dry skin types, your goal is to keep your skin hydrated. Drink lots of water and wear moisturizers in the morning, after a shower, before you put on makeup, and before bed. A tip in applying moisturizers, let the moisturizer dry before layering another product on top suck as acne treatment or makeup. This will all the skin to absorb the moisturizer giving your skin the moisture it needs.


 Did you Know:
Do you think you have combination skin? Faces with combination skin are characterized with a very oily T-zone as other regions (i.e. cheeks, forehead, chin) are dry. The center of the face is usually the oiliest part of the face for everyone. Having a noticeably oilier T-zone does not entirely mean you have combination skin. In fact, many dermatologist disregard the combination skin type label**. It is best to find one skin type for your face and treating your face according to one skin type.


**Natural Beauty at Home by Janice Cox page 58.


Saturday, September 22, 2012

C25K Workout App Review


Here is a great app that can help you build your cardio strength through interval training. I have been using this app since the first day of August and it has made wonders for training myself to run. I have completed 5 weeks and I have improved my running distance as well as my stamina. 

The sole purpose of this app is to help you train for a marathon. The free version will help you train for running a 5K distance. However, there are other versions of this app that will train you for longer distance, for a price of course. If you are just starting out, like me, you are fine getting the 5K FREE version and working your way up to further distance. 

The workout routine goes as follows: a five minute warm up walk and intervals of jogging and walking. As you start off, the app will take into consideration that you are just starting and will ask you to run for a minute and walk for two minutes. Continuing the workout training, your running time will increase and your walking time will decrease. Basically, it will train you to run further distances as well as improving your stamina. 

The workouts are divided into weeks with a recommended three days a week routine. For example, the first week, you will run for a minute alternating with two minute walks for three days. Then, the second week will have you run for 90 seconds and walk for 90 seconds. The app will basically tell you what to do so it is recommended that you run at a quiet environment or wear headphones. The good thing about  this app is that it lets you listen to your music while you run and will still give out commands to direct you in your workout. 

Through experience with this app, I am very satisfied with the results this app has given me. It is a great way to become more active and lose weight. With app, I have lost a good amount of weight (10 pounds!) I am continuing this app to train for the Turkey Trot 2012 in San Jose. Since school has started, I haven't been using the app, but I am still determined to continue to keep my cardio up.

To see results, you have to be committed to doing the workouts. It doesn't have to be daily! The app only has three days per week. So, it is up to you to decide when to run. I am very confident that this app can help you build your cardio. Hopefully, when I finish the app, I'll be able to continue training through the other versions. This specific app is available on your iPhone for Free! If you have any questions, feel free to leave me a comment and I will answer them for you :)


 Stay Beautiful!
- arlynangel

Thursday, September 20, 2012

Healthy Eats


Pesto Garden Sandwich

This sandwich is one of my favorites! It's really easy and it tastes amazingly delicious. Not only is this sandwich really easy, it's also a great healthy meal using the simplest ingredients! Soon, I will be posting a pesto recipe, but if you are comfortable using your own pesto, you are welcome to tweek this sandwich as much as you like.

Bon appetit!


                             Ingredients:


  • 2 slices of bread
  • Thinly cucumbers
  • Thinly sliced tomatoes
  • Alfalfa sprouts
  • Basil pesto
  • Your choice of deli meat


1. Take your two slices of bread and spread a thin layer of basil pesto on each slice
2. Arrange your deli
3. Layer your tomatos, cucumber, and alfalfa sprouts
4. Top your sandwich off with the slice of bread


Simple, Easy, Healthy, Delicious!!! This sandwich is a great meal for work, school, and after a good workout :)


.... Oh yeah, have you ever had those moments where you felt like you sliced too much? Especially after trying to stack the sandwich with the last pieces of tomatoes? Well, I like to cut the left overs into chunks, put them in a bowl, and add my favorite vinaigrette. Now you have a side salad to go with your sandwich. YUM!

Create It For Less


Leonardo Da Vinci Inspired Wall Decor


Have you ever saw something at the store, particularly home decor or furniture, that you really want, but don't have the heart to pay over the top prices?! A few weeks ago, while school shopping, I went to Ikea to pick up a desk lamp. I was walking around the art decor section of the market place and noticed a woman and her husband admiring a framed picture of Leonardo Da Vinci's Notebook sketches. Being the nerd I am, I immediately fell in love with and I had to have it! After a long search for the sketches, I was devastated to learn that it was $40!!! Definitely not a college student's budget. After looking at the pictures, I sadly parted ways. However, my boyfriend, who was nice enough to come with me, suggested that I make one just like it. He told me that if I made one, I can google pictures of Da Vinci's sketches and choose which ones I wanted and make it more personalized. Knowing me, I really liked the Da Vinci concept and personalizing it made the concept even better. I was able to buy a frame for just about $10 and (with the suggestion from my boyfriend) some scrapbook paper that resembled aged paper from Michaels for $1 (I was lucky there was a sale that day). I was able to get photos by Google images and used Elmer's glue to attach the photos to the backdrop. Total cost: $11!!! This was so much cheaper than buying the original, plus I was able to personalize it to my liking. Instructions on how to make this is below.

Materials:
  • 1 triple window frame -> I used Ikea's RIBBA, but you are welcome to choose a frame of your choice 
  • Da Vinci photos -> If you are not into Da Vinci, you can personalize this project to reflect your tastes
  • Scrapbook paper -> For this project I used aged-style paper, but you can use any type you'd like
  • Pencil
  • Scissors
  • Pencil
  • Glue

Procedure:
1. First, open the frame and measure the appropriate dimensions onto your scrapbook paper. This will be used for the boarder paper, so you have to make sure it fits the entire frame window. Then, while following the dimensions you measured, cut the boarder paper out.

2. After choosing the photos you want to display, print them out! I just used ordinary printer paper to make it seem like actual notebook sketches. You can use actual photo paper to make your project stand out. 

*NOTE: Make sure these photos are slightly smaller than your boarder paper. This ensures that the boarder paper you made will show.

3. Once you have all your photos and boarders, neatly glue the photos onto the boarder paper. Make sure the the boarders are even! Use a pencil to mark the photo in place, so that when you are ready to glue, you can reference the marking to make sure your photo is centered.

4. Let the glue dry. Place the photos gently in the frame and secure the backing. 

Voila! You just made a $10 purchase into a $40 work of art!